In this tutorial, you will get a feel for the basics of the Python language by coding a simple implementation of Conway's Game of Life.
First Things First
Download and install Python 2.7.5. Note that the code for tutorials and projects in this course are only tested on Python 2.7.5.
Make sure you are able to run Python from the terminal. To test this, first type "python" in the terminal and make sure you see a result similar to the following:
$ python
Python 2.7.5 (default, May 15 2013, 22:43:36) [MSC v.1500 32 bit (Intel)] on win
32
Type "help", "copyright", "credits" or "license" for more information.
>>>
Now, create a new text file called "hello.py" which contains only the line
print "hello!"
In your terminal, make sure you are in the same directory as "hello.py" and type "python hello.py". You should see a result similar to the following:
$ python hello.py
hello!
If both of these worked, you should be good to go for the tutorial!
Game of Life Overview
Our "Game of Life" board will be an n-by-n grid of square cells, each of which can be either "alive" or "dead". A given cell's neighbors are those cells directly above, below, left, or right of the cell, plus with the cells diagonally adjacent to it (the cells touching its diagonals). Each cell changes from one time step to the next according to the following rules:
- Any living cell with fewer than two living neighbors dies.
- Any living cell with exactly two or exactly three living neighbors remains alive.
- Any living cell with more than three living neighbors dies.
- Any dead cell with exactly three living neighbors becomes alive.
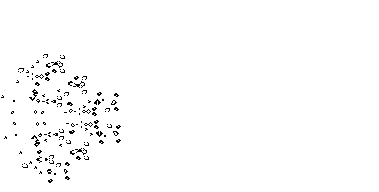
These extremely simple rules give rise to some incredibly complex and beautiful patterns, as illustrated here:
In fact, these rules are so powerful that they actually allow Conway's Game of Life to be Turing Complete, which roughly means that we could perform any computation within the game that a standard computer could (though they would be painfully slow). And to just get super meta for a second, a consequence of this is that Game of Life can simulate ITSELF! (#Conwayception)
Download the Tutorial Files
Download the files here, and unzip them.
You're now ready to start the tutorial!
Part 1: The Dictionary Approach
We now begin writing our implementation.
Open the file "life.py" in the "part1" subfolder of the "gameoflife" folder you downloaded.
What you're looking at is a class called "Life". In Python, classes have the following format:
class <Name of class>:
  def __init__(self [,other arguments]):
    # Constructor code goes here

  def otherMethod(self):
    # method code
One of the first things you should understand about Python is that, unlike Java, it allows you to both define and set the value of instance variables in the same line. Thus, instead of needing to define our instance variables outside of the constructor and setting their values inside of it, we can simply write "self.variable = value" in our constructor and have "self.variable" serve as an instance variable which can be used by any other methods in the class.
Now that we know this, write the code for Life's constructor. Define instance variables "rows", "cols", and "grid".
Next, implement the methods "isAlive(self, row, col)" which returns True if the cell at the given row and column is alive and False otherwise, "setAlive(self, row, col, tf)" which sets the cell at the given row and column to have the value tf, "getNumRows(self)" which returns the number of rows in the game board, and "getNumCols(self)" which returns the number of columns in the game board.
To do this, you'll need to know how to use Python's list and dictionary data structures, as the board passed into your constructor is a list of dictionaries. In Python, an n-by-m list of zeros (which is similar to an n-by-m array in Java or C) is initialized as
list = [[0 for x in range(n)] for y in range(m)]
The element of the list in row r and column c can then be accessed:
list[r][c]
Or set to a different value:
list[r][c] = 5
If a list in Python is similar to an array in Java, then a dictionary in Python is similar to a Map (i.e., HashMap or TreeMap). A dictionary is initialized as
dictionary = {}
Instead of being indexed by numbers, dictionaries can be indexed by any type of data, as in:
dictionary[3.14] = 'pi'
dictionary[False] = 7
dictionary['tasty'] = 'banana'
In our case, each cell in our board is a dictionary which maps the string 'alive' into True or False, depending on whether the cell at that position is alive or dead. For example,
board[2][3]['alive'] = True
sets the cell in the second row and third column to be alive.
Finally, implement the "runTimeStep(self)" method. This is the ultimate test of your understanding of lists and dictionaries, as you'll need to leverage those structures along with the methods you've written to implement the rules of Conway's Game of Life. For your convenience, we have provided two methods in util.py: "createEmptyGrid(rows, cols)" which returns a new grid with the given dimensions in which all cells are set to be dead, and "getNumLiveNeighbors(grid, row, col)" which returns the number of living neighbors in the given cell of the given grid.
Once you've implemented all of the methods correctly, you can try out your implementation by running
python runlife.py <Board File>
where <Board File> is one of the files we have provided: "blinkerBoard.csv", "toadBoard.csv", "beaconBoard.csv", "gliderBoard.csv", or "pentominoBoard.csv". Try them out, and if you'd like to explore more you can make your own boards and run them the same way!
Part 2: The Class Approach
In this part, you'll learn the advantages of "upgrading" from a dictionary structure to a class, and write your first Python class from scratch!
Close the files you have open from Part 1, change to the "part2" folder, and open the "life.py" file.
Once again, we're asking you to implement the methods in the Life class. However, this time instead of using a dictionary data structure to keep track of the cells, you'll create a Cell class.
Create a new blank text file called "cell.py" in the "part2" folder and use the information on defining classes given in Part 1 to write your own Cell class, with an "alive" instance variable as well as a constructor that takes in a single boolean argument determining whether the cell will start off alive or dead, and any other methods you find yourself needing to implement the methods in "life.py". For your convenience, the "util.py" file in the "part2" folder has an updated "createEmptyGrid(rows, cols)" method which creates a two-dimensional list of Cell objects with the given dimensions, each of which is set to be dead.
Once again, when your implementation is correct you will be able to run "runlife.py" in the same manner as in Part 1 and try out the different boards.
The solutions to both parts can be downloaded here. Have fun!