CS 193A: Android App Development, Winter 2019
Deploying an Android App to Your Phone
last updated Tue 2015/01/13
To test an Android Studio app that you have written on your own physical device such as a phone or tablet, follow these steps.
Step 1. Enable Developer Mode on Phone
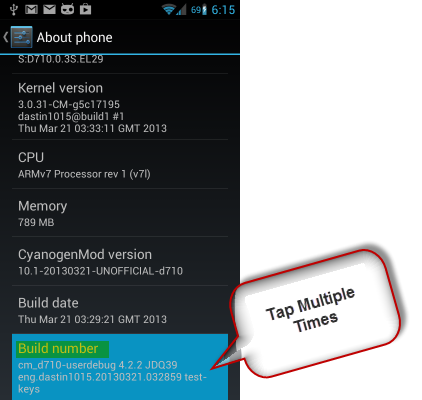
First, set your device into Developer Mode to enable several features that are useful for app developers and debugging. Go to your phone's Settings menu, then click About Device. In the list that appears, find the item named "Build number" and tap it with your finger 7 times. You should see a "Toast" notification saying, "Developer mode has been turned on."
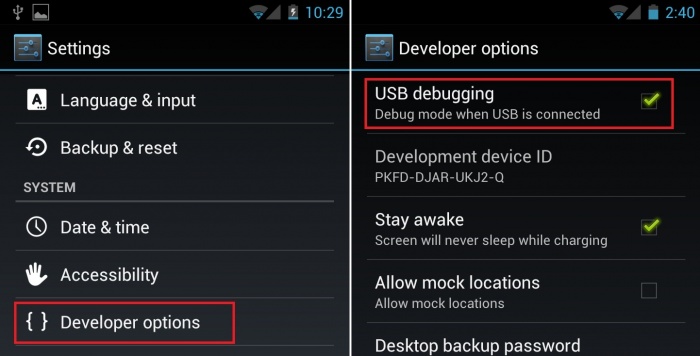
Now go back to the main Settings menu, and click Developer options. Inside this new menu, you must check the box labeled "USB debugging".
Step 2. Set Up Your Operating System to Connect to Your Phone
Your operating system may need some steps so that it can interact with your phone properly when it is plugged in. See the following instructions for your operating system.
- Windows: Make sure to install the OEM USB Drivers that were described in the Working at Home page. If you already did so, you are ready to skip to the next step.
- Mac OS X: There's nothing that you need to do. Hooray!
- Linux: It's tricky. See this Google page on Hardware Devices for more information.
Step 3. Connect the Device
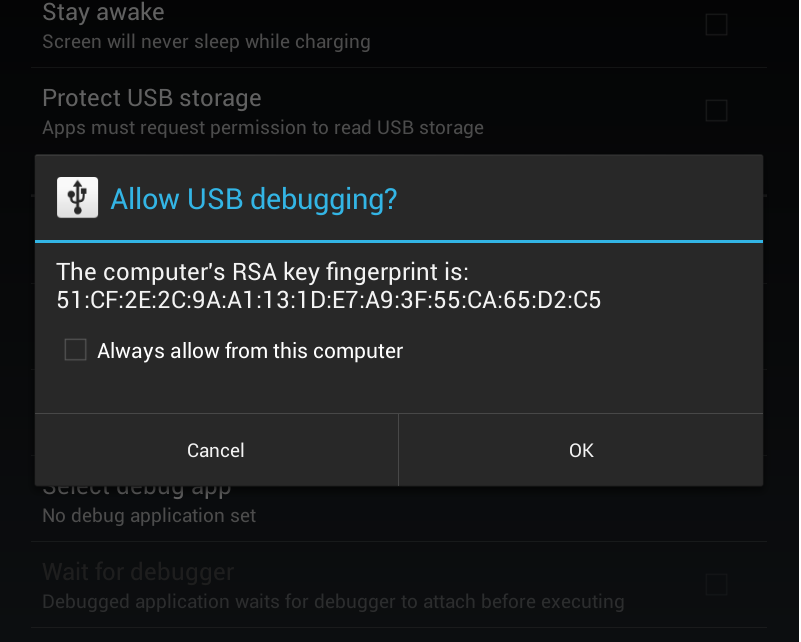
Now plug your phone into the computer via USB. If everything has worked properly so far, you should see a dialog pop up on the phone's screen asking whether to authorize this computer for debugging. (If you do not see such a dialog, try unplug/replugging the device; try disable/re-enabling the USB Debugging option in the Developer options menu on the phone; try restarting Android Studio; and try running the Android Device Monitor from Android Studio's Tools → Android menu.)
I highly recommend that you check the "Always allow from this computer" box for easier future use.
Step 4. Deploy and Run the App
Now in Android Studio, click the "Play" button icon in the top toolbar to run the app: ![]() A list of devices should come up.
If you've completed the preceding steps properly, you should see your phone listed.
(If you see "[UNAUTHORIZED]" next to your phone's name, it means you have not authorized the computer for USB debugging as described in the previous step.)
A list of devices should come up.
If you've completed the preceding steps properly, you should see your phone listed.
(If you see "[UNAUTHORIZED]" next to your phone's name, it means you have not authorized the computer for USB debugging as described in the previous step.)
If you haven't yet authorized USB debugging (bad): 
|
If you have authorized USB debugging (good): 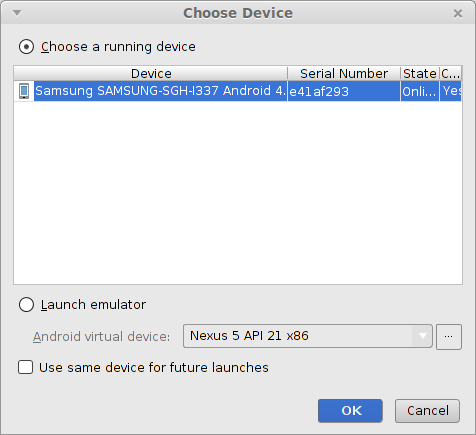
|
Choose your device from the list and click OK. If everything worked properly, your app will build and then copy itself over to the device and then start running. You did it! Your new app should run immediately, and/or it should appear in the phone's list of all apps when you pop that up.
If you get stuck or need more information on any steps of this process, see Google's Android page on deploying to hardware devices:
Common Errors
If you see the following error message in your Android Studio console on connecting your phone or tablet:
insufficient permissions for device
Then perform the following steps:
- In Android Studio, click the top Tools menu, then choose Open Terminal.
- In the terminal console window that appears, type:
adb kill-server
adb start-server
- Now unplug and reconnect your device. Hopefully it should be recognized. You may need to accept the USB connection on your device's screen first.