The Genius Drive Revamp Project
(OR Creating a VistaPE USB bootable
thumb drive with PGP by Varun Tansuwan)
IV. Installing Winbuilder &
Configuring VistaPE
Project
a. Downloading the WinBuilder
main
project website:
http://winbuilder.net/
b. The direct download page is
http://winbuilder.net/download.php?list.3
c. Go to the link above and download and
install the
latest WinBuilder (this guide assumes Winbuilder 076)
d. Extract the contents to a folder (this
guide
assumes c:\Winbuilder076\)
e. Run
WinBuilder.exe and on the right
side where it
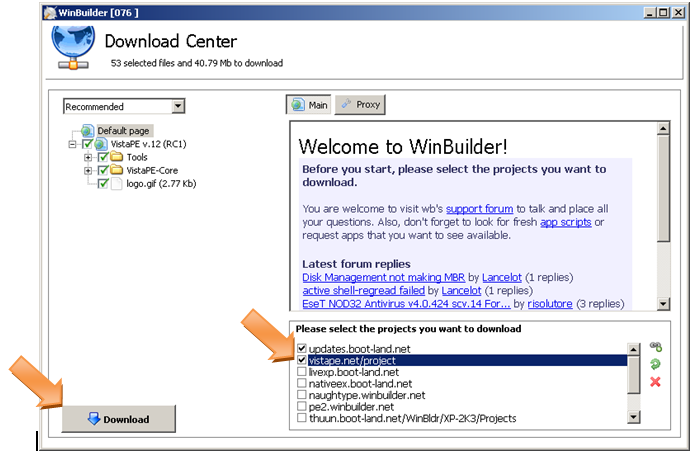
says “Please select the projects you want to
download”
choose vistape.net/project then click the Download button on the left.
Note: It may have errors downloading certain parts. Just hitting the
Download button in the upper right, and clicking the download button
until all pieces have downloaded successfully.

f. Test a
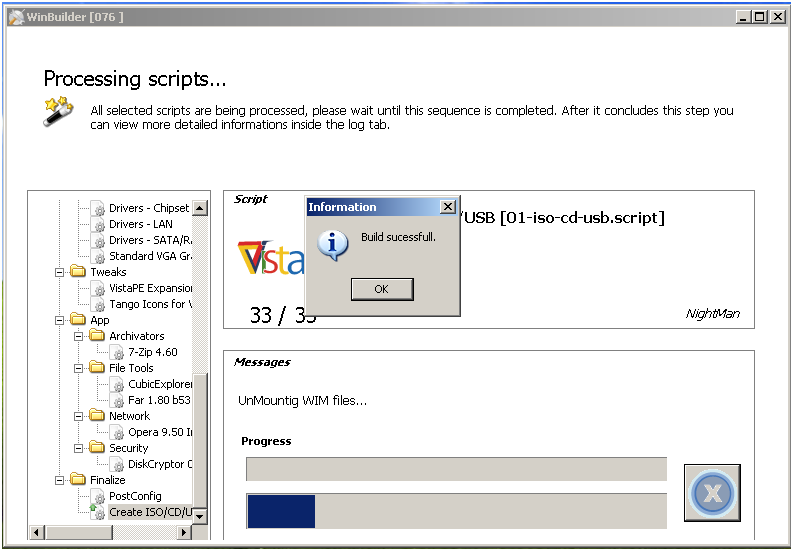
build. When everything is done
downloading
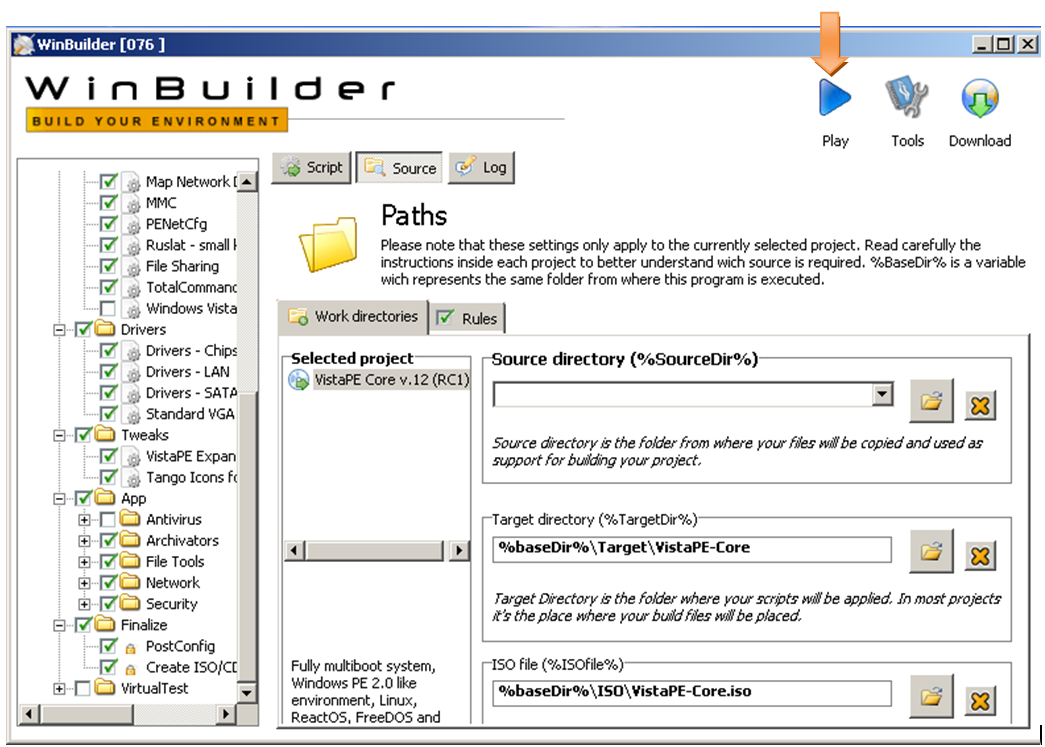
you should be able to hit the big blue play arrow to start a script
build. When it is finished you should end up with a VistaPE-Core.iso
file in the c:\Winbuilder076\iso folder. This image file can
be
burned to CD/DVD and used to boot a machine into the VistaPE
environment.
g. Go ahead
and test the VistaPE-Core.iso
file. If
you are building under a VM you will have to transfer it out of the
virtual machine to do so. See Page 8 {II.a.xi} for instructions on
setting up network share. You can create a new VM and then map the
CD-ROM to the image file. If this is a physical CD just go ahead and
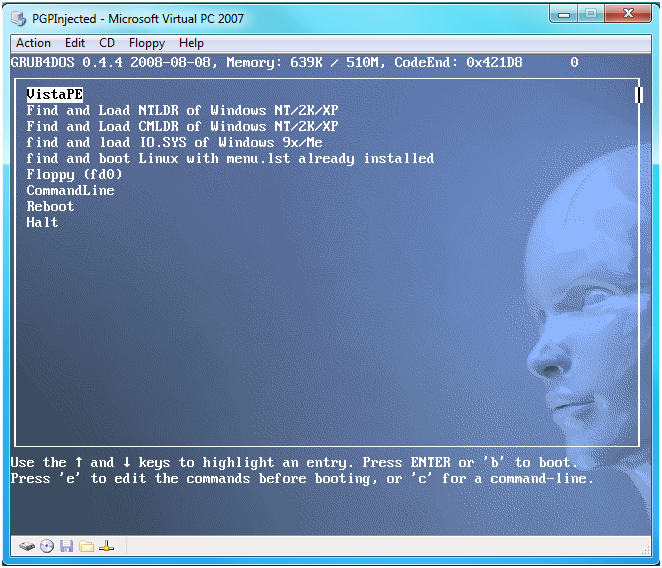
boot off of it. If everything is working it should boot to GRUB4DOS
first then continue to VistaPE.
Looks good so far.
Last Update 06-17-2009


