Qt Creator Installation - Windows
1. Download and install Java Development Kit (JDK)
Go to Oracle's Java JDK download page. On that page, under the heading labeled "Java SE Development Kit 10.0.1", click the button to Accept the license agreement, then click the Windows x64 link (it should be the last one in the list) to download the appropriate installer for your operating system. You don't need to download the "Demos and Samples Downloads" link. Once you have downloaded the Java JDK installer .exe file, double-click it to run it, which will install JDK on your computer. You can choose all default options during the installation.
(Yes, you do need to do this. Even though this course is in C++, our libraries also require Java to function properly.)
2. Download and install Qt Creator
Go to the Qt Creator official download site to download this software. Now scroll down to "Windows Host", and choose Qt 5.11.1 for Windows (2.4 GB). Your download will begin. The file is very large, over 2 GB in size. Once you have downloaded the Qt Creator installer .exe file, double-click it to run it, which will install Qt Creator on your computer.
Important:
For most screens, you should choose default options during the installation.
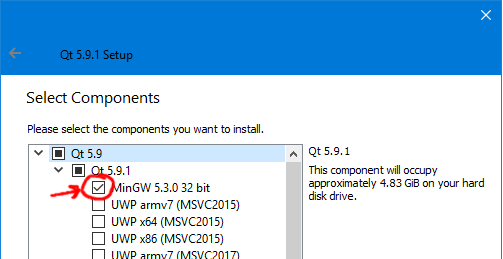
But at the screen labeled "Select Components", you must expand the "Qt 5.11.1" tree by clicking the > triangle next to it, and then you must click the checkbox labeled, "MinGW 5.x.x 32 bit".
This is absolutely crucial; if you forget to do this, your computer will not be able to compile and run C++ programs.

3. Try to compile/run a sample project
Let's make sure that all the parts are working together properly by building and running a sample Qt Creator project that uses the Stanford C++ libraries. The Stanford C++ libraries also interact with Java, so if this project runs properly for you, then you will be sure that your Qt Creator and Java JDK are both set up properly. Here's what to do:
- Download the following project ZIP file to your computer.
- Un-zip the file's contents to a directory of your choice. You should have a directory named simple-project with several files and folders inside.
- Open the project. In Qt Creator, choose "File" → "Open File or Project..." or press Ctrl+O (or Command+O on Mac). Navigate to the simple-project folder and open the file simple-project.pro.
-
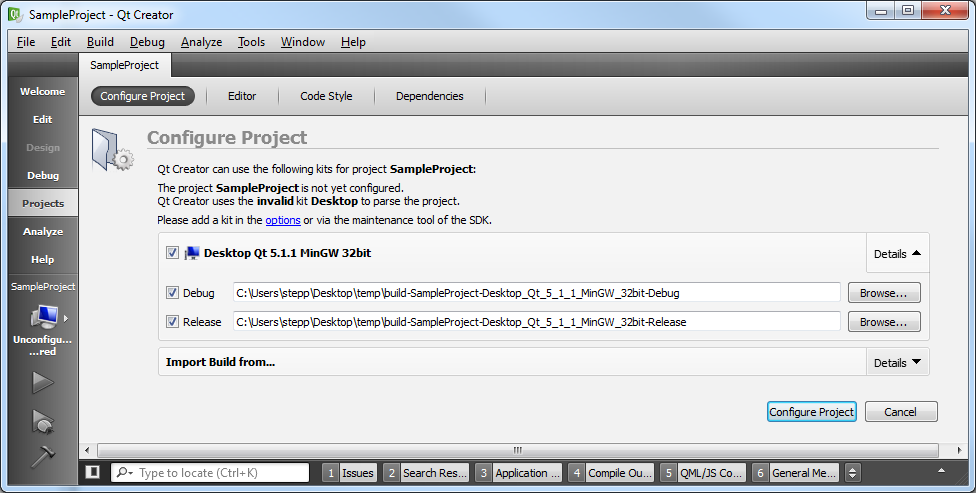
Qt Creator will ask you a few questions about how to set up the build process for this project.
You can just accept the defaults and click "Configure Project".

- Build it. Now you should be able to Build (Ctrl+B or Command+B) your project in Qt Creator. If it builds properly, your C++ compiler and the Stanford C++ libraries are at least compiling properly. The first time you build a given project, it will take a while (30-60 sec or more) to compile all of the various libraries. You can click the bottom "4 Compile Output" tab if you want to see the progress as it is compiling. (Recommended: In Qt Creator, click Tools → Options → Build & Run, and check the box labeled "Open Compile Output pane when building" to always see this output during compilation.)
-
Run it.
Now that it's built, you should be able to Run (Ctrl+R or Command+R) your simple-project.
This is the part where Java is needed, so if your Java isn't properly installed, this is probably where it will fail.
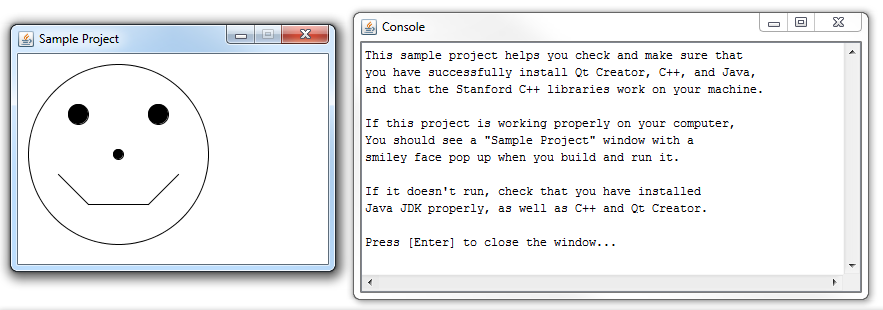
If it runs properly, you will see a window appear with a smiley face.
Congratulations, you're done!
Now your machine should work just fine for working on our homework assignments.

If you encounter any problems during your attempt to compile and run the sample project, check out our Qt Creator troubleshooting page. Otherwise, congratulations; you're done!
