Introduction Introduction
|
History
|
 Process Process
|
Thank Yous
|
||
|
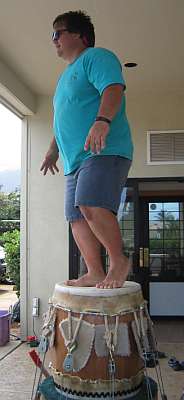
The Second Stretch
| |||||
|
Drum manual written by Alix Koyama and Dylan Solomon. Please visit the Acknowledgements page to see the many people who helped us with this project. | |||||